MMDVM instruction step-by-step
This is a short manual for setting up MMDVM hotspot or repeater using Kavkaz SD card image created by Igor UA6HJQ.
STEP 1. HARDWARE.
You need to purchase next components:
- Raspberry PI3
- 8GB or 16GB Class10 MicroSD card
- Arduino DUE
- Shield for Arduino DUE, for example designed and assembled by ES1BIS
- Power regulator 12V to 5V min 3 Amps
- Usb to microUSB connection cable 15-30cm
All components availible on Ebay.com
STEP 2. SDcard image installation
I am using a full complete SDcard image for Raspberry PI3 created by Igor UA6HJQ.
Many thanks to Igor for this image! It have all needed components for MMDVM repeater or hotspot
including software for programming Arduino.
You can download it from http://ua6hjq.qrz.ru/voip/kavkaz1114.7z
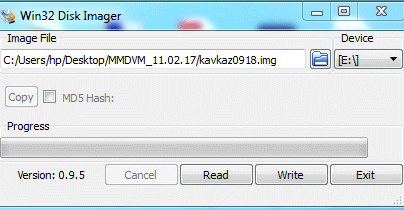
Write image to you SD card using Win32DiskImager software.
STEP 3. First start.
Connect Raspberry PI USB port to Arduino DUE Programming port (near DC jack) using USB cable,
insert SDcard with installed image, connect LAN cable to Raspberry and connect Raspberry to power supply.
Wait 2 min for full boot of operating system.
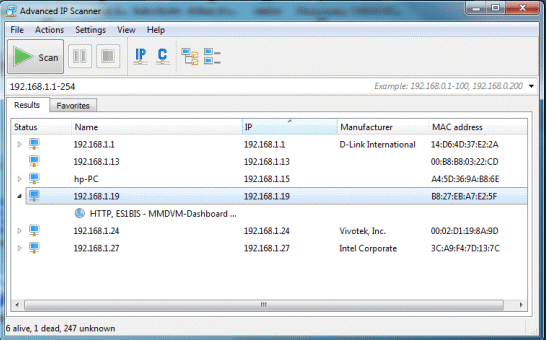
Raspberry will get IP address by DHCP, now you need to find IP address. It can be made simply using
Advanced IP Scanner software, you PC need to be connected into same network, where connected Raspberry.
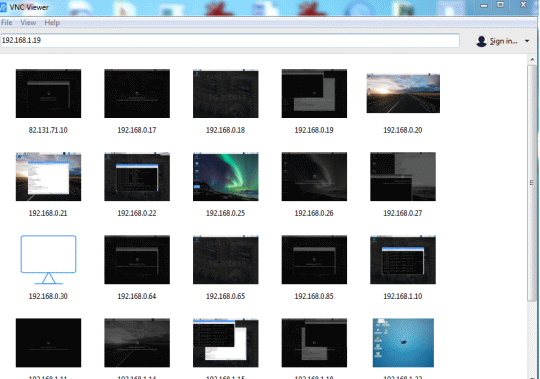
Now you need to download VNCviewer software for remote access to you Raspberry Pi.
Start VNCviewer and enter your Raspberry IP address, press Enter.
Click Allow in new window, VNC will ask for username and password.
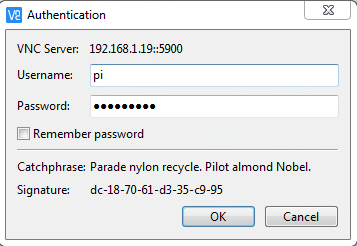
Kavkaz image username is pi and password is raspberry.
After login you will see a Linux graphical desktop.
First you need to expand filesystem using text console.
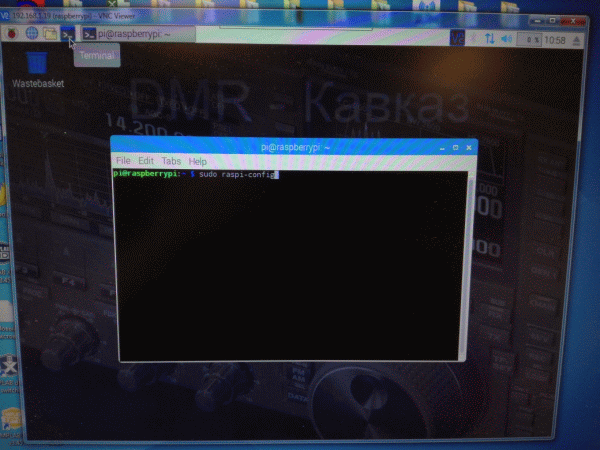
Click to console icon and enter
Sudo raspi-config
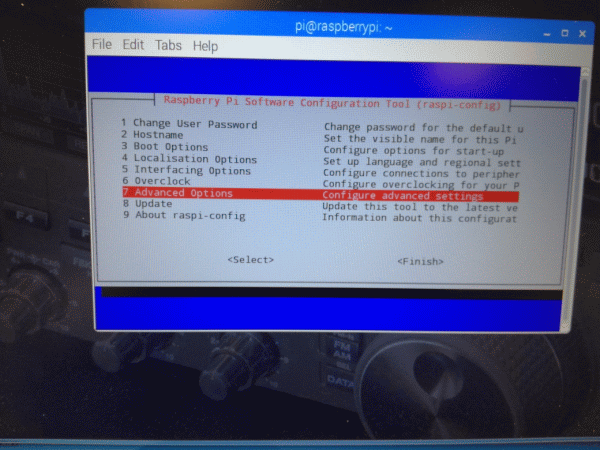
Choose Advanced Options, then Expand Filesystem.
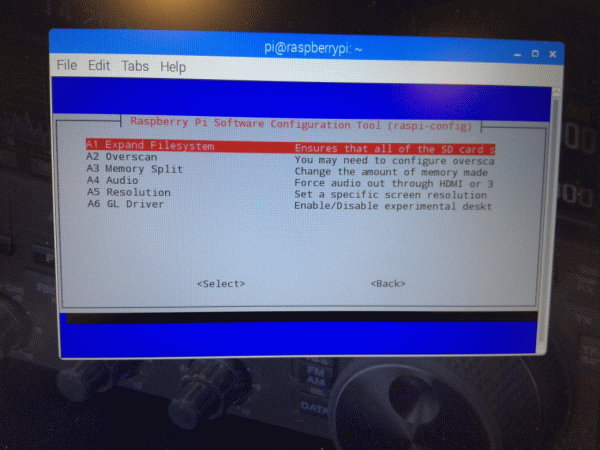
Click OK, Finish. System will ask to rebooting, allow it.
After rebooting you have working system.
STEP 4. Arduino DUE programming.
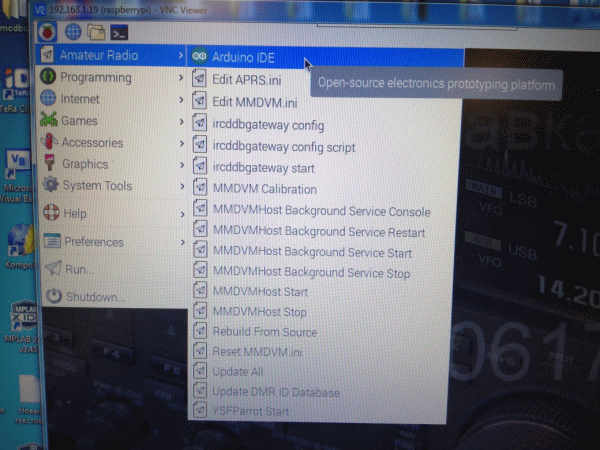
In main menu choose Amateur radio then choose Arduino IDE.It will start using its working directory.
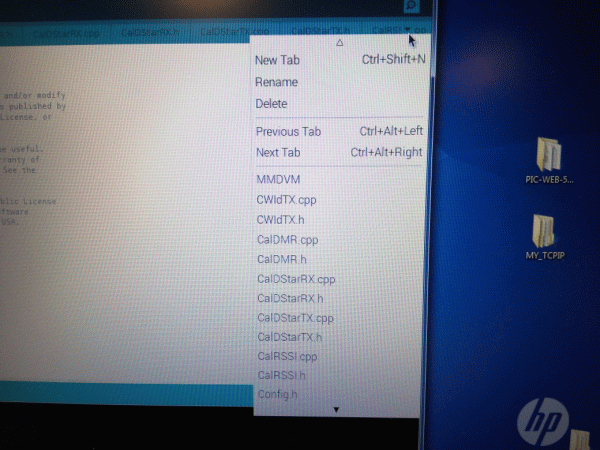
Choose config.h file to edit.
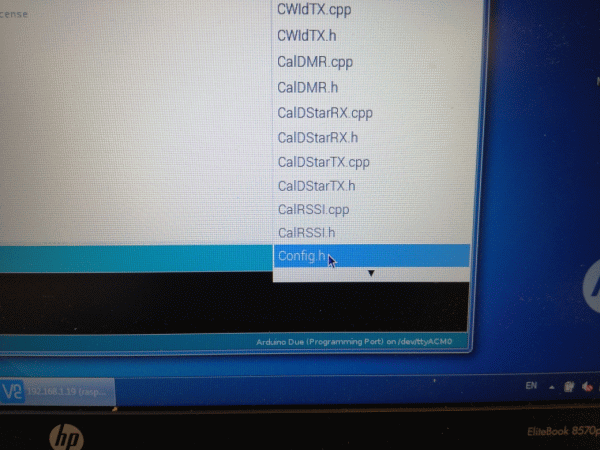
If you using ES1BIS ZUM shield, you need to comment ( add // before #) external oscillators, comment NTH
board type and uncomment (delete // before #) ARDUINO_DUE_ZUM.
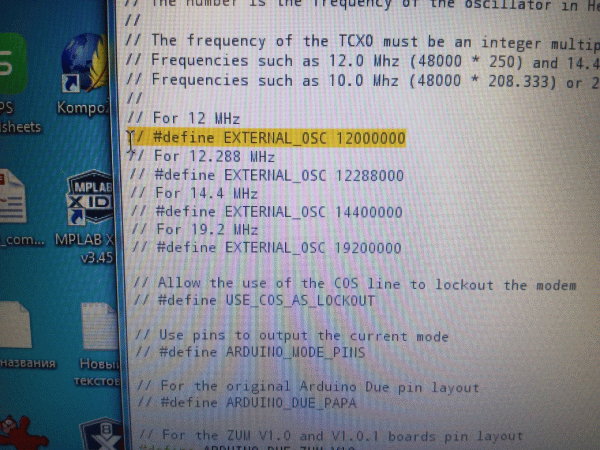
Save changes.
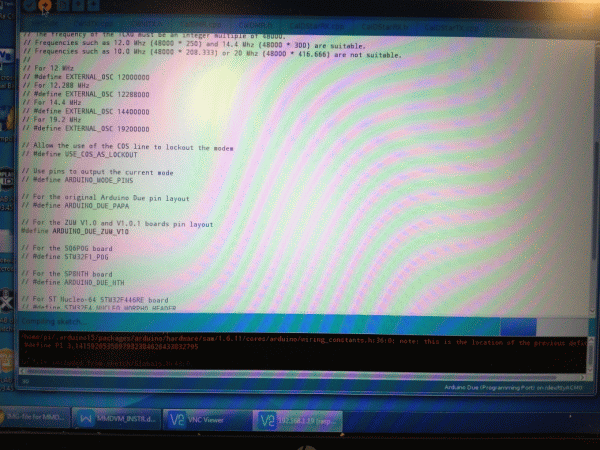
Press Compile and Upload button. Compiling take a few minuts, after compiled file will be uploaded to arduino.
If you got error message after compiling, press Upload again.
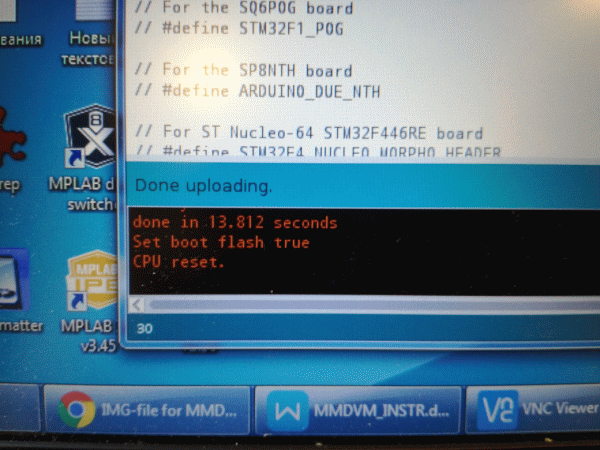
Unprogrammed Arduino have green LED blinking once per second. If programming and booting success, LED will flash faster.
STEP 5. Edit MMDVM.ini file
In main menu click Amateur radio then Edit MMDVM.ini.
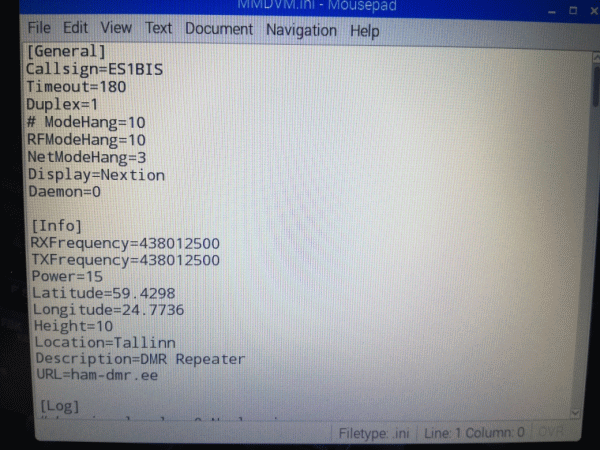
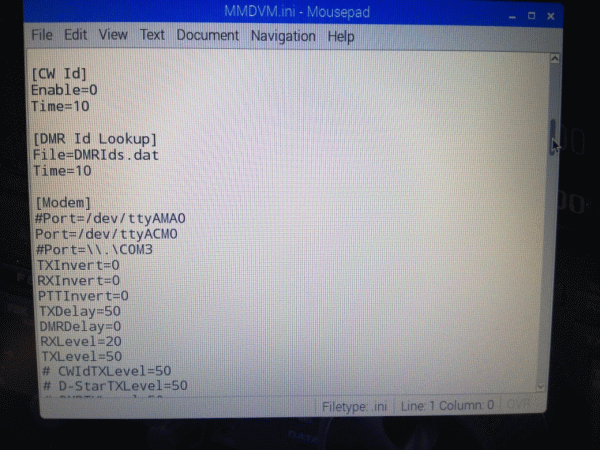
You need to enter own callsign, DMR ID, your repeater parameters and allowed modes.
GENERAL section. Insert you callsign. Edit Duplex=0 for simplex hotspot, Duplex=1 for duplex repeater.
NB! For first system setting up and always use only simplex mode! Duplex=0
INFO section only for information to show on Brandmeister dashboard.
MODEM section. RXGAIN, TXGAIN, RXINVERT, TXINVERT parameters is individual for each radios type and configuration.
DMRDelay can be 50 and TX delay=50
For example for Motorola GM340 and ES1BIS shield TXINVERT=0, RXINVERT=0, RXGAIN=50, TXGAIN=4.
DMR section. DMR=1, ID=xxxxxxxx enter you DMR ID
DMR NETWORK section. Enable=1. For simplex hotspot put Slot1=0. In radio you need to use slot2
Save changes by File-Save
STEP 6. System starting
Start MMDVM Host service
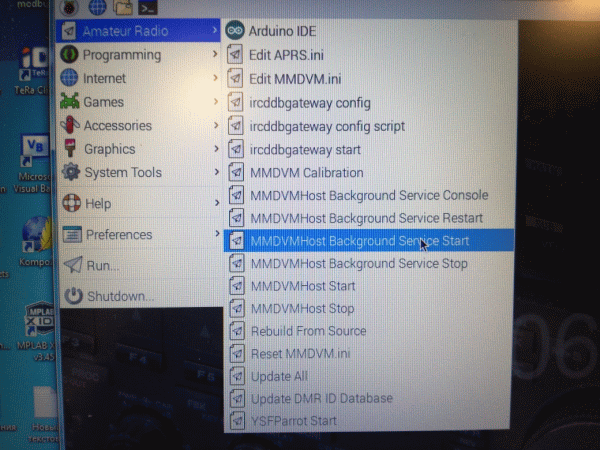
Arduino LEDs will flash faster
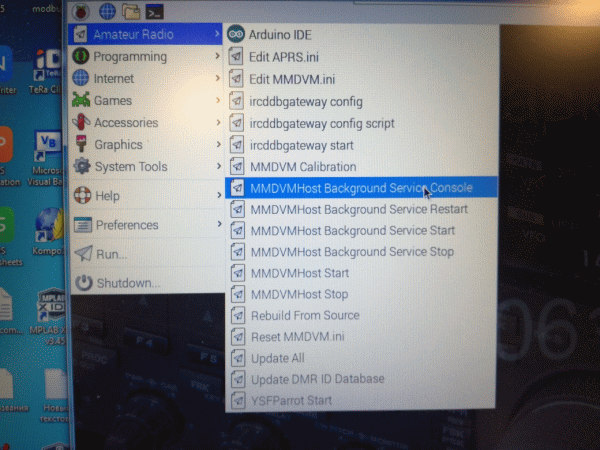
Start MMDVMHost console
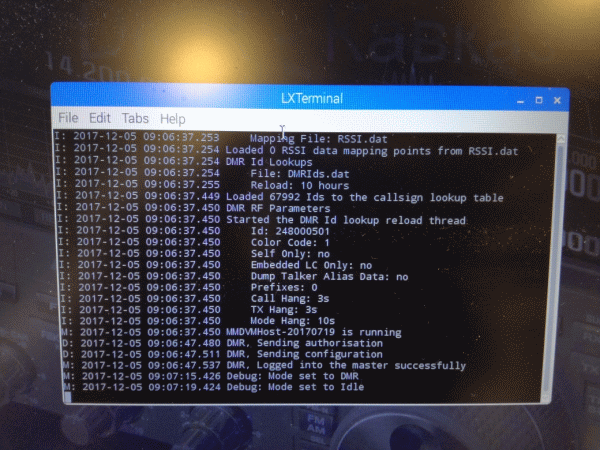
If configuration success, you hotspot will connect to master server.
STEP 7. AUDIO settings.
Go to you Brandmeister dashboard, you will see your active hotspot. For transmitter setup you need to get a permanent
dmr stream from network. Subscribe many talkgroups, I usually use a groups 202, 214, 216, 220, 222, 260, 262.
If group active, radio will transmit and you need to set audio levels by trimmer and by TXLevel value in Modem section in
MMDVM.ini file. Usually TX need a very-very fine tuning.
If you have SDR dongle, this procedure will be simple.
For setting RX mode you need to transmit by handradio and set rx value by trimmer and RXLevel setting in MMDVM.ini.
If received signal is ok? RX LED in shield board will be on.
You can find many information about system setting up in Google.
73!
ES1BIS